While most apps can access the internet in such a scenario, you may not be able to sign in to Outlook or any Microsoft 365 apps. This issue usually happens due problems in the DNS lookup process that your system uses to determine internet connectivity. But there are also a few other reasons for the error. In this article, we mention all such reasons, along with how you can troubleshoot them.
Why Does my Windows Show No Internet Access but Internet Works
How to Fix Windows Shows No Internet Access
There are a few ways to resolve the Windows shows no internet access issue depending on the nature of your issue.
Errors on the NCSI active probe settingsNetwork Driver issuesInaccurate hostname resolution on the Hosts file or DNS cacheDNS servers going down frequently
First, try restarting your computer and check if you still experience this error. If yes, go through the possible solutions we have mentioned below and apply them one by one.
Run Internet Troubleshooter
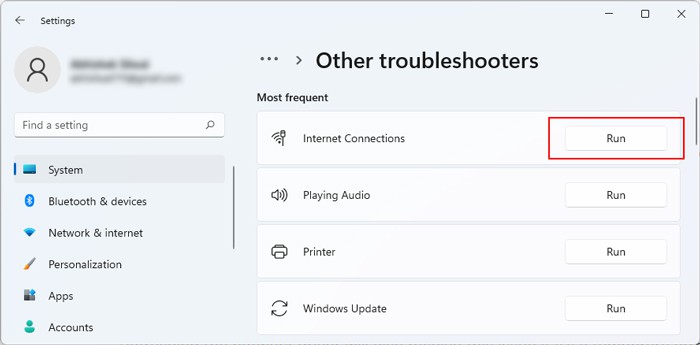
The first thing you should try in such scenario is to run the Windows troubleshooters, specifically Network Adapters and Internet Connections. Sometimes, few minor underlying issues can cause the anomaly in indication of network status, which the troubleshooters can fix easily. To run these programs:
Refresh Network Driver
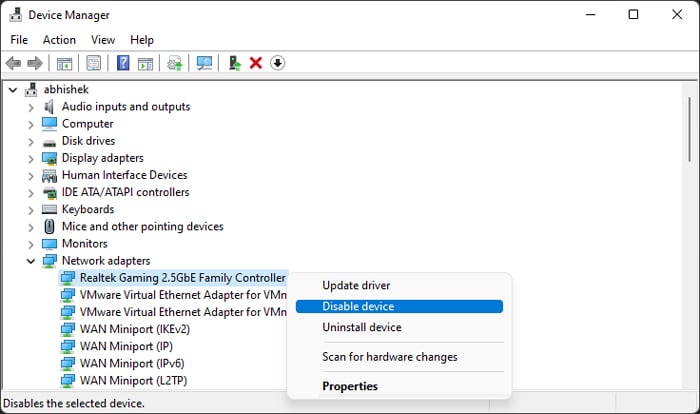
Refreshing the network driver will also resolve this issue if it’s a temporary error. Doing so makes the system recheck whether it’s connected to the internet or not. Here’s how you can refresh the WiFi or Ethernet network driver:
Disable IPv4 Checksum
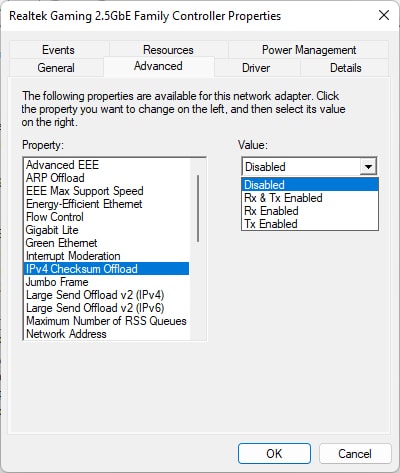
If the Network Interface Card drivers are incompatible or IPv4 Checksum option for the device is enabled, your LAN connection may show no internet access. In such cases, first try updating your LAN driver to the latest version. We recommend downloading it from the manufacturer’s website. If the issue remains, use the following instructions to disable IPv4 Checksum Offload:
Check NCSI Active Probing Settings
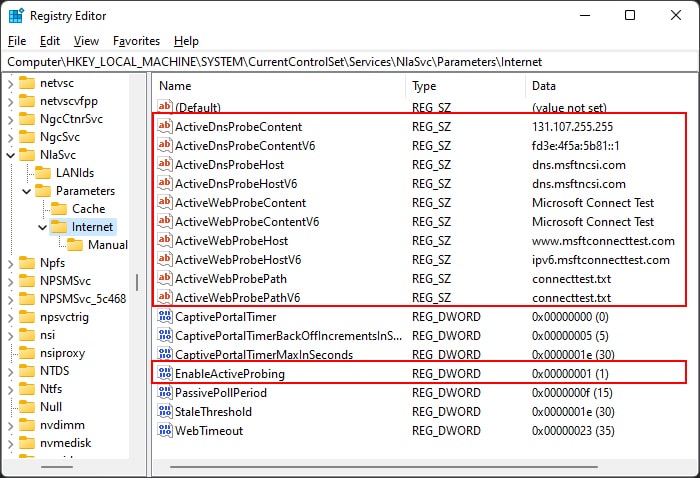
Windows uses Network Connection Status Indicator (NCSI) Probing feature to determine internet connectivity. Your system regularly sends a DNS and HTTP request to a certain web page (by default the Microsoft Connect Test website’s http://www.msftconnecttest.com/connecttest.txt page) for such probing. The registry stores the information on the ip address, domain name, page name, etc., for this web page. If there’s any discrepancies with this information, the probing fails and Windows determines that there’s no internet access. You can still use the internet through your browsers or third-party apps in such a scenario. However, some Universal Windows Platform (UWP) apps like Outlook fails to connect to the internet. An easy way to resolve this issue is to, To permanently resolve the issue, You need to check and change the settings for both your group policy and registry to resolve this issue.
NCSI Group Policy
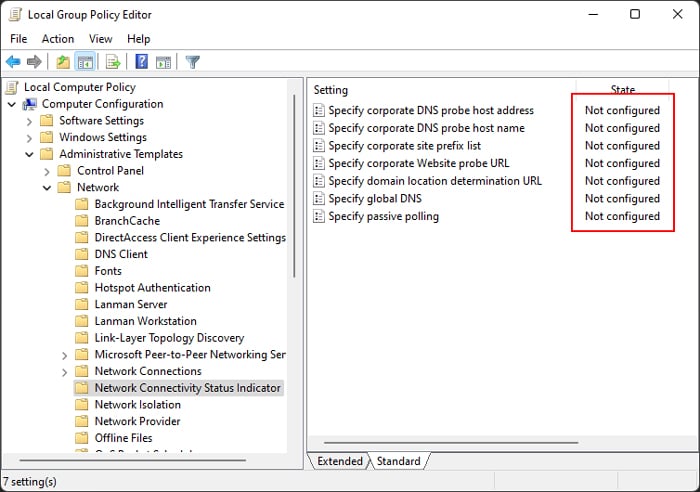
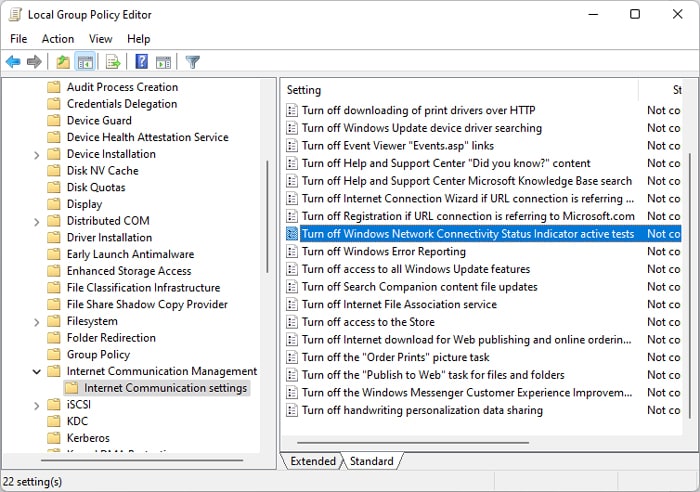
Your group policy settings can override the registry settings. So, it’s better to make sure to remove any configuration for the NCSI policies and let solely the registry editor handle the information. Here’s what you need to do:
NCSI Registry Entries
After setting the policies to Not Configured, you need to make sure your registry stores the standard information. To do so, Make sure to backup your registry before making any changes to it.
Check Outage at Microsoft’s Connect Test Page
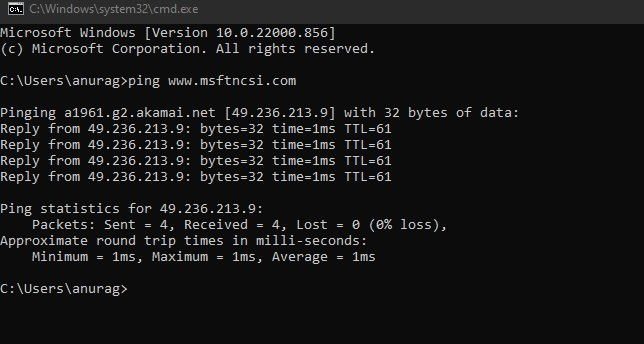
As we mentioned earlier, your Windows system checks for internet connectivity by probing on the Microsoft’s Connect Test Page. If this website’s server or the DNS probe server is down, you’ll temporary encounter the “No Internet Access” error. You can check for the server outages or issues (dns.msftncsi.com and www.msftconnecttest.com) on the down server detecting websites. This issue should resolve itself after some time, so the only thing you need to do is wait.
Specify Global DNS
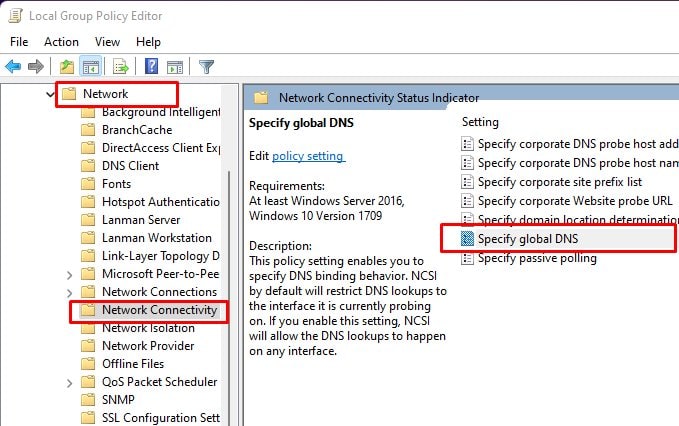
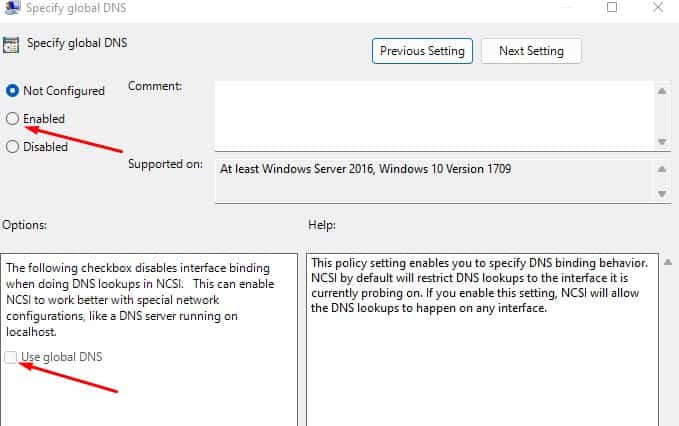
By default, NCSI only allows DNS lookups to the interface it is currently probing on. However, if you use DNS protection agents or forwarders on an endpoint, the interface changes. You need to enable the use of global DNS for this lookup to allow the DNS lookup on any interface. To do so, Restart your PC and check if the issue resolves.
Reset Network Components
If your DNS or IP cache contains wrong information on the host name resolution for Microsoft Connection Test website, your system can’t send or receive requests to this website. The NCSI active probing fails in such cases and you’ll get the No Internet Access error even though internet works. You need to flush the DNS cache to resolve the issue. But it’s better to reset your network components altogether to resolve any other potential connection issues. Here’s how you can do so:
Change DNS Servers
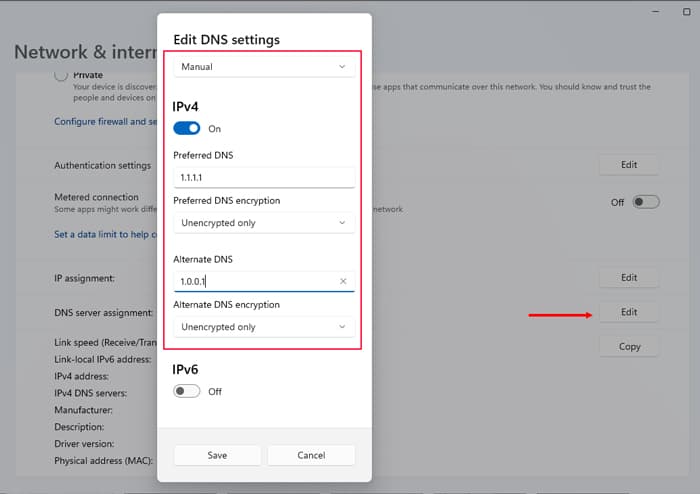
If your ISP’s DNS goes down frequently, you’ll still be able to browse the internet but your system can’t send the NCSI DNS request, resulting in this issue. You can change the DNS servers to a public one to resolve such issues. It’s better to change the DNS server on your router’s portal and then refresh your DHCP using the ipconfig /renew command. But you can also change the DNS on your device. To do so on Windows: There are many public DNS server you can use, such as: If you want to compare these two, Cloudflare is more secure but Google is faster. So, pick one according to your preference. Cloudflare
Edit Hosts File
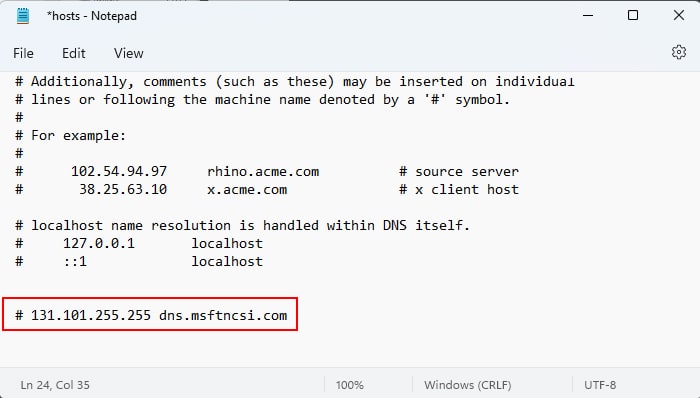
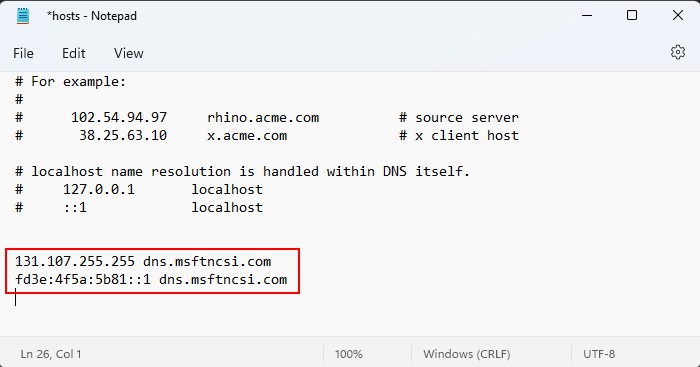
Another thing you should do is to check your hosts file. Your system looks at the hosts file for domain name resolution even before the DNS cache. So if you have somehow entered wrong mapping information for the Microsoft Connect Test DNS probe or websites, the probe fails. Here’s how you can resolve the issue: Restart your PC and check if the issue resolves.
Disable NCSI Active and Enable Passive Probing
While NCSI uses active DNS probing to validate internet connectivity, it can also use passive probing when active probe is turned off. Such passive probing use your application’s network activity to determine internet connectivity. So, you can completely bypass the issues with the NCSI active probing process by disabling it and enabling passive polling. First, disable active probing on both group policy and registry using the following instructions: On Group Policy On Registry Then, enable passive probing on both group policy and registry settings using the steps below: On Group Policy On Registry
