WiFi problems can generally be attributed to a weak signal or router malfunction. Sometimes, outdated network drivers or corrupted files can also be the cause.
Why Is My Wifi Not Working on Windows 11
How to Fix if Windows 11 Wifi Is Not Working
First thing first. Make sure your device WiFi is turned on. Next, see if you have the correct credentials for your WiFi. If you are not seeing your WiFi name, ensure your router is turned on and broadcasting. You can use a WiFi strength analyzer app from Microsoft Store to check your WiFi signal strength. Before diving deeper, you should also try restarting your router and your computer and see if that fixes the problem.
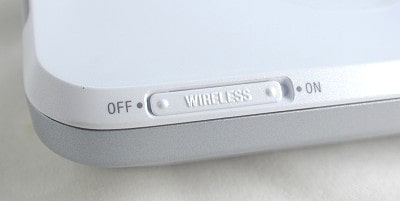
Toggle WiFi Hardware Switch
Some devices come with a WiFi hardware switch. Inspect your laptop closely to see if your device has a WiFi hardware switch. If you have one, and it’s set to Off, toggle it to On.
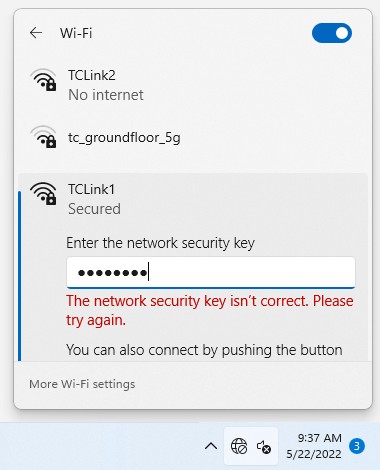
Incorrect WiFi Credentials
If your WiFi password has been changed and you have not updated the password on your device, you may be unable to connect. In this case, windows will let you know. You need to input the current password on your computer to be able to connect to the WiFi.
Try Moving Close to the Router
If you have a weak signal or your WiFi is constantly dropping, it might be that you are not ideally located with respect to where your router is placed. If you and your device can move, try moving closer to the router. If your router is located at an edge or a corner of your apartment, you might not be getting the best coverage. It is a good practice to place your router centrally with respect to the floor plan of your apartment. A centrally located router can much better cover the entire floor area. We also have a comprehensive article with fixes on Slow Wi-Fi. We are confident that you’ll find it worth reading. Do leave your valuable feedback!
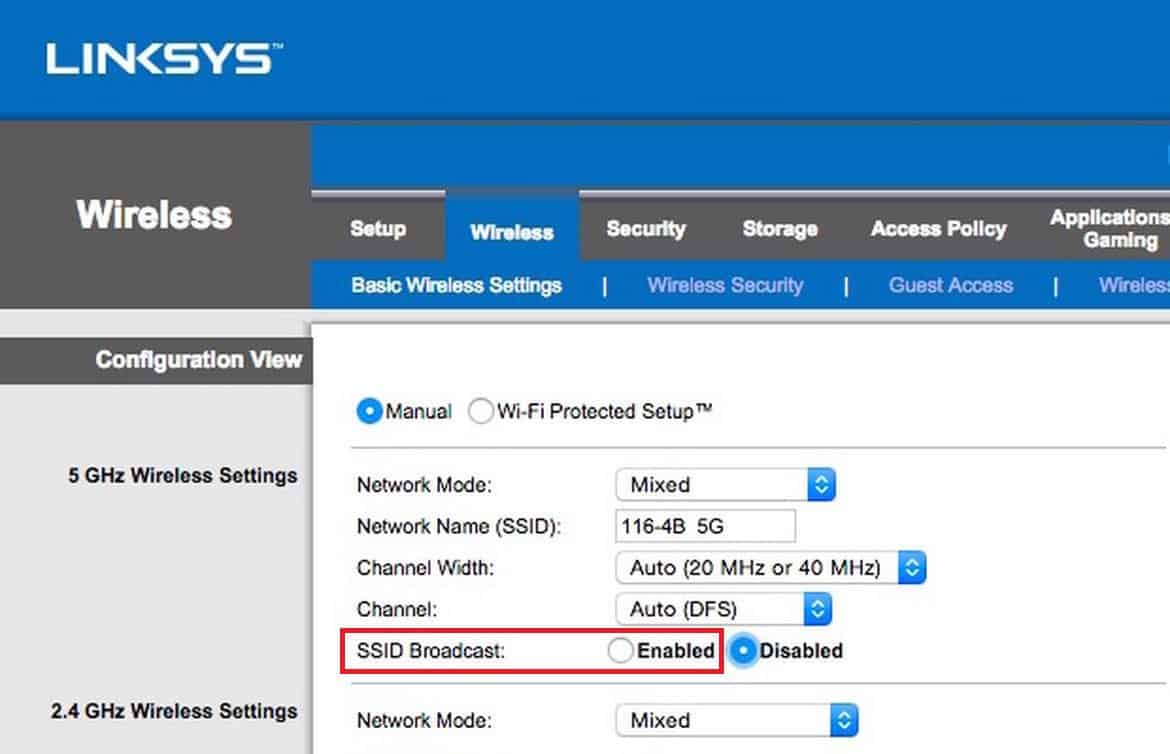
Turn on SSID Broadcast
Service Set Identifier (SSID) is your WiFi network’s name that you connect to. You can set and change SSID from your router. If you are right next to your router but cannot find your WiFi connection, check to see if your router is set not to broadcast the SSID. To do this, follow these steps:
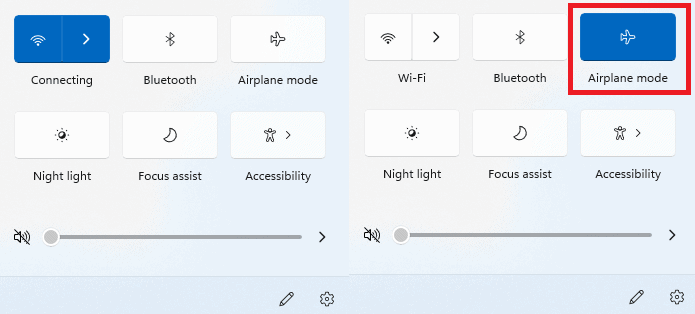
Enable and Disable Airplane Mode
One simple fix is to enable and disable airplane mode. Check if you can connect to the internet now.
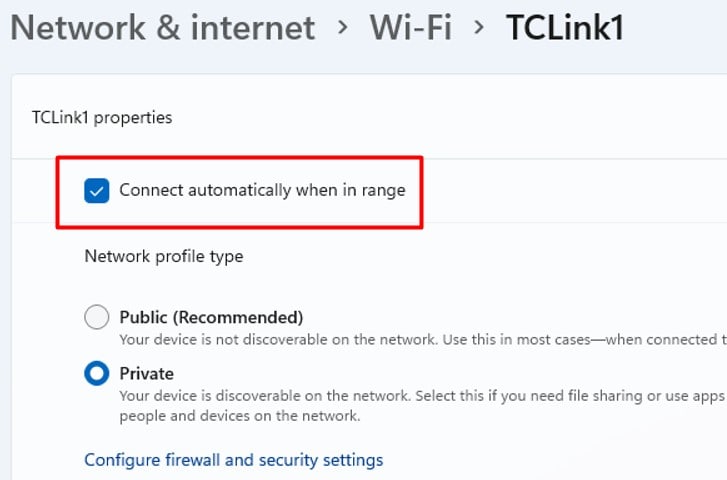
Enable Connect Automatically When in Range
If you have disabled connect automatically when in range for a specific network, you will not connect to that network even though everything is working and you have the correct credentials. Check if you have this toggled on for your network. Otherwise, follow these steps to toggle it On –
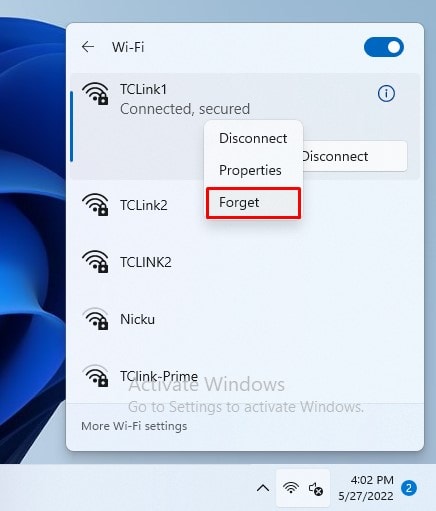
Forget and Reconnect Wifi Network
One solution to misbehaving WiFi network is that you can forget that WiFi network and reconnect to it again. To forget the WiFi network, follow these steps – This will remove the credentials stored for that WiFi network. To reconnect, you will need to choose that particular WiFi network and enter the credentials (password).
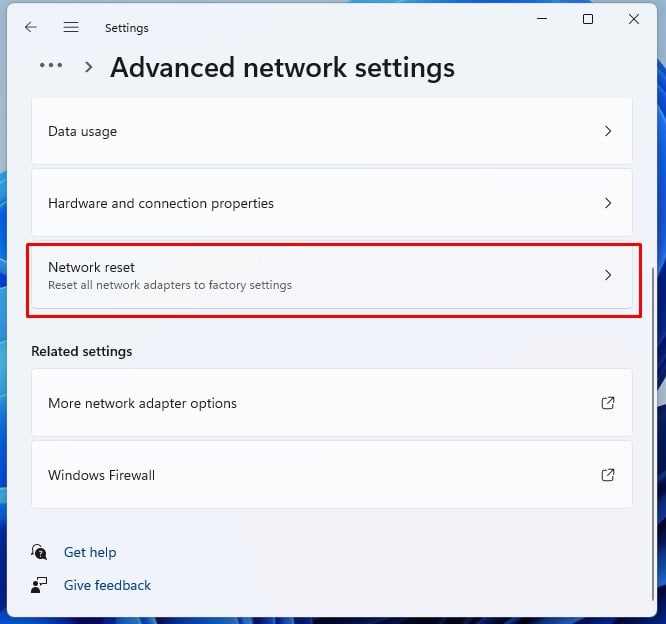
Reset Network Settings
You can try resetting network settings to see if that lets you connect to the internet. Wait for the process to finish and reboot your device.
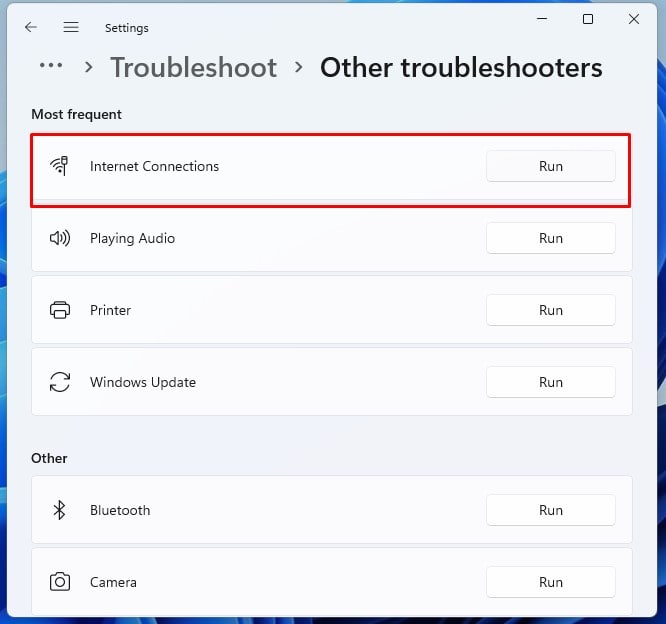
Run the Internet Connections Troubleshooter
You can try using the Windows Troubleshooter. The troubleshooter will attempt to diagnose the problem based on your input. Troubleshooter is effective in diagnosing setting misconfigurations and resolving them. Follow the on-screen instruction. Once all steps are completed, try connecting to the internet.
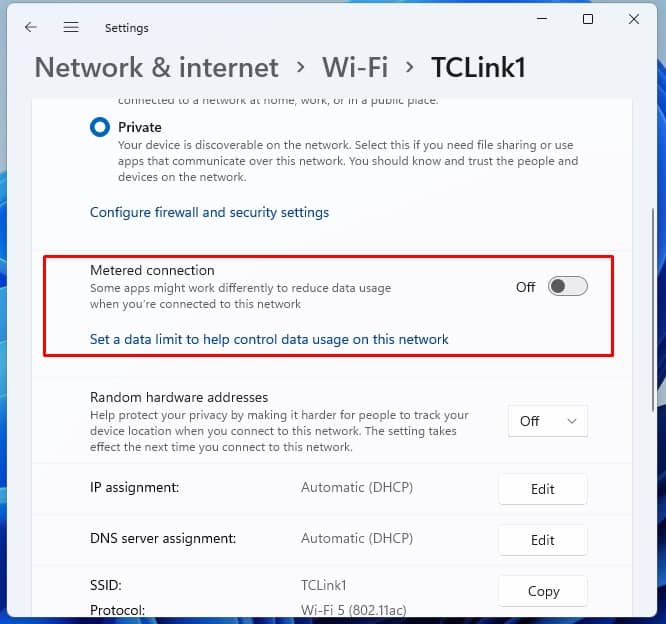
Disable Metered Connection
Metered connection limits access to the internet once a certain volume of data has been utilized. Enabling metering is important for people on a limited internet plan who do not want to exceed a certain data volume limit. If your WiFi is not letting you access the internet because you have a metered connection, here is what you can do to fix it:
Flush DNS Cache
A DNS cache stores the IP address of websites you already visited locally. That means you won’t have to wait for a response from the DNS server. You will be able to load the page faster. If the DNS cache is corrupt, you might not be able to connect to the website you are looking for. Follow the steps below to flush DNS cache – See if this fixed the issue. Otherwise, proceed to fix below.
Disable Power Management Setting for Network Adapter
Check to see if you have power management enabled for the network adapter. Sometimes your network adapter fails to wake up from a state of sleep. This will cause you to not connect to the internet even if everything else seems fine.
Disable Antivirus / Firewall
Check to see if your antivirus or firewall is causing you to not connect to the internet. Temporarily disable your third-party antivirus software. If this fixes the issue, try using different antivirus software. To disable the firewall:
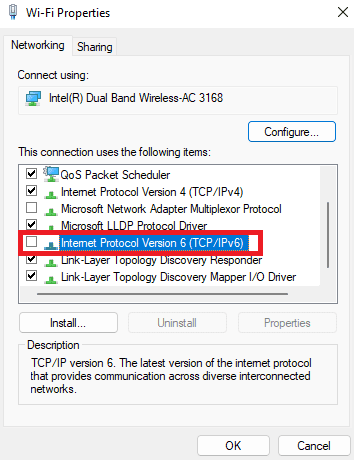
Disable IPv6 Settings
Internet Protocol version 6 (IPv6) is the most recent version of the Internet Protocol. Older devices that do not support IPv6 protocol might lead to a conflict that can keep you from connecting to the internet. In this case, you might try disabling the IPv6 settings. Please follow these steps – Check to see if you can connect to the internet.
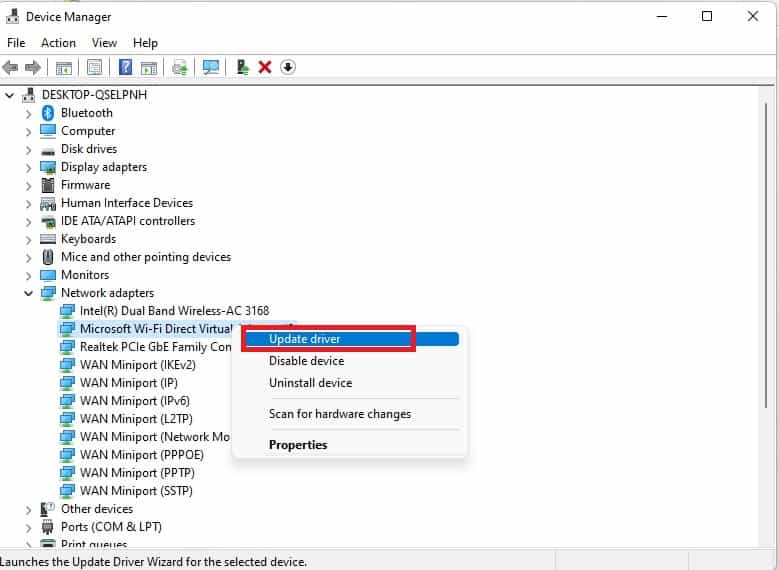
Update WiFi Driver
See if updating your WiFi driver fixes your issue
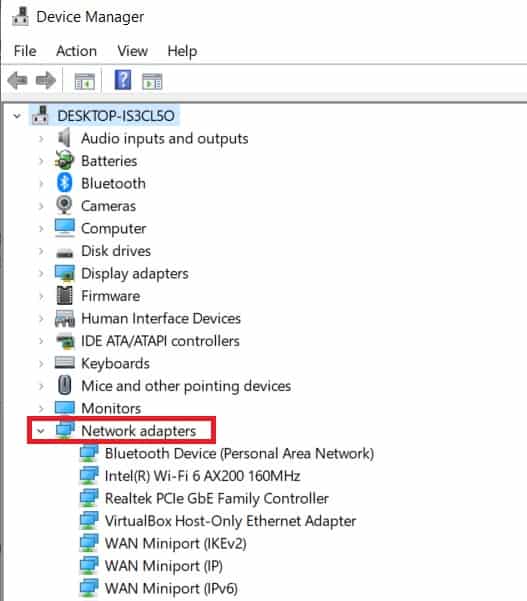
Press Win + RType devmgmt.mscExpand Network AdaptersRight-click the WiFi adapter Click on Update driver
Follow the on-screen instructions.
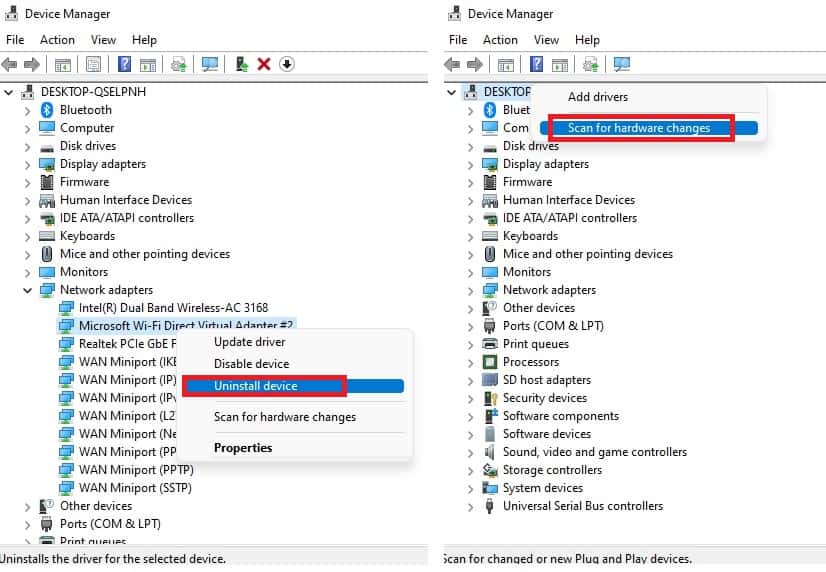
Reinstall WiFi Driver
If updating the WiFi driver did not help, there is a chance that it is corrupted. In this case, you would need to reinstall the WiFi driver. To do so, follow these steps – Wait for this process to complete. Then on Device Manager, right-click on your device name and click on Scan for hardware change.
Update Windows
You can also try the Windows Update and see if this fixes your problem. To do so,
