The game also feels extremely rewarding after many tries and finally defeating the toughest boss in Sekiro. The software studio has done a remarkable job balancing souls like difficulty into a fast-paced action fantasy world. Unlike dark souls, which is more of a slow and steady combat perspective, Sekiro leans more on fast-paced and exhilarating fights demanding players to act quickly.
All Sekiro Bosses in Order
With all the bosses in Sekiro, I will also provide tips and tricks to defeat them. Defeating any boss is easier once you master the art of deflecting and parrying. Using the right item and weapon art for the right boss also changes the tides of battle. No matter how you play, it takes a lot of trial and error to finally learn the way of combat, as every boss has a different fighting style. Here is every boss you will encounter and tips on dealing with them.
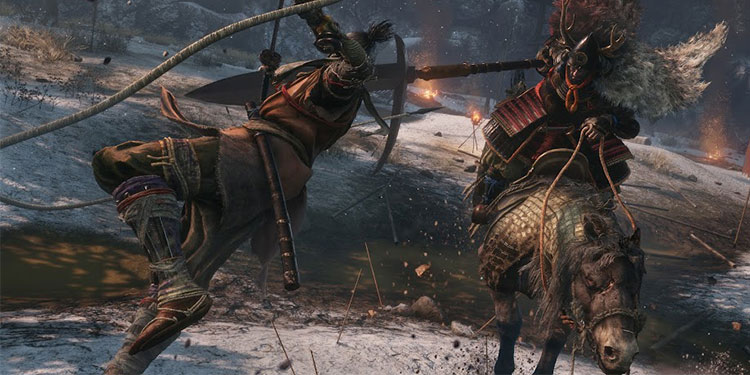
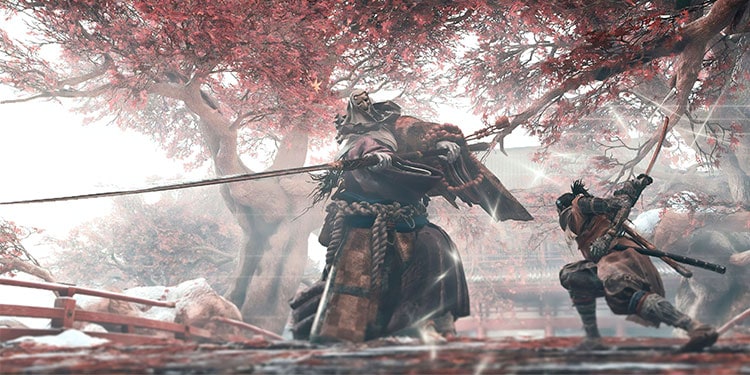
Gyoubu Masataka Oniwa
He yells his name while mounting on a horse and lunging towards you. The first boss in Sekiro will attack you swiftly with his long halberd. He is also mounted on a horse so be ready to deflect his attack and strike afterward. He is a little aggressive as you lock him running his horse around you. If you are a hit-and-run person, the grappling hook attack will help you attack from a safe distance. I suggest combating Gyoubu as doing so will increase your parry skill to use in further harder boss fights.
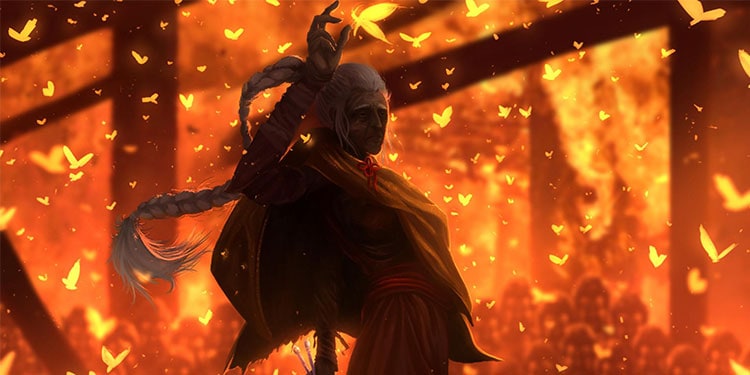
Lady Butterfly
You will encounter her in the Hirata Estate memories area. She is an optional boss, so it’s your choice to fight her or skip the fight. To fight her, you should use the advantage of wooden pillars because she will throw projectiles in your way. The best way to tackle her is to dodge and attack. One hit attack and dodge right away to the left or right and hit her again. This continuous process of consistent dodging sideways and attacking will get her confused and you will slowly but gradually deplete her health to zero. Once she is up in the air, bring her down using kunai but don’t get too close until she is on the ground. In her second phase, she will summon her shadow minions. This is where you use your snap seed and make them vanish. Once they are gone, you can focus on the boss. She will now also summon butterflies to throw them at you. Don’t lose your composure and proceed to hide and dodge. It’s a slow process, but it’s better than dying and repeating.
Genichiro Ashina
Fighting with Genichiro Ashina is like a dance of swords. He is fast and will attack you the second the battle starts. If you feel like the fight is too challenging, you can explore more and come back with better items and counters. You need to dodge as much as you can attack. Attacking without thinking of defense will get you killed. You have to read his moves and attack to the slightest change. Slowly but gradually, his health will go down. In the second phase, he becomes a little aggressive. It is difficult to defeat him in the first attempt because his attacks change in phase two. You must keep him close and parry his attack to raise the poster meter and counter.
Folding Screen Monkeys
There are Four monkeys you need to kill in the Illusive Hall of Senpou Temple. Invisible white monkey, purple monkey, orange monkey, and green monkey. If you chase away any monkeys, use the bell to reset their position, and you can now see them in the place you encountered first. There are other monkeys to distract you but defeating them, including four monkeys, is easy. It’s more of a hide-and-seek game fighting.
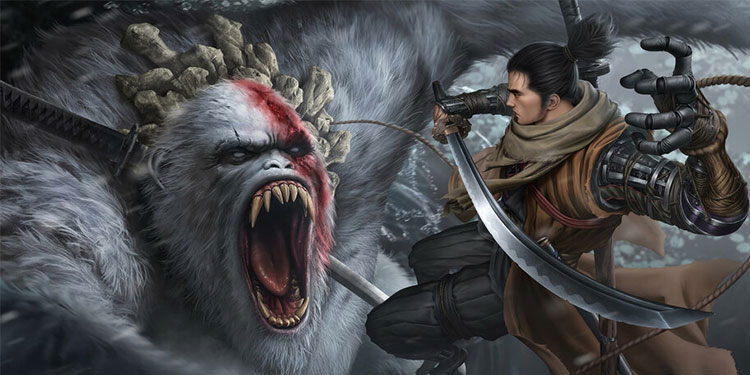
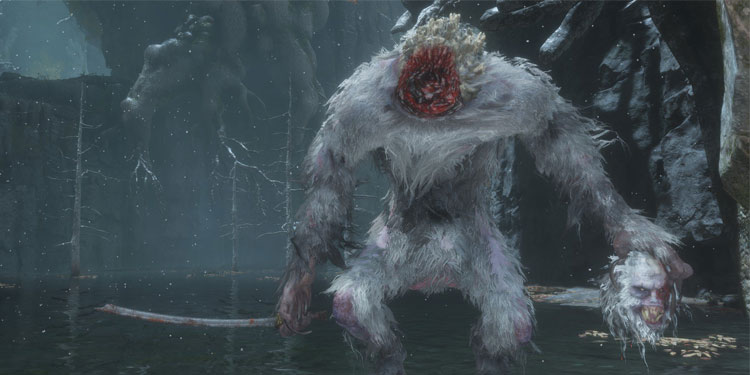
Guardian Ape
It’s time to learn his way of fighting to counter his attacks. He is wild and furious and will not let you breathe if he gets you, so maintain distance and learn his moves. Equip your firecracker because you are going to use it most often here. He is fast, so you need to run out of his sight and attack whenever you get change. He will fart at you and slam his poop towards you. If, by some chance, you are close to him, use a firecracker to stun him for a while. This will give you enough time to land a couple of hits. You can unleash firecracker just after dodging his poop slam attack. His second phase is where he will wield a huge sword and also attack you with his roar. Roar will inflict a lot of damage, so be on the lookout. It’s a slow hit-and-run process, but stay vigilant, and you will defeat the boss.
Headless Ape
When you somehow killed Guardian Ape, and you realize there are two additional apes you need to defeat. However, it’s an optional boss and can be skipped completely. But if you’re feeling pretty brave after killing Guardian and want a second match, then you can go to Ashina Depth, and you will find him. In the second phase, he will call out his ape friend, and you are now fighting both of them simultaneously. Just focus on his friend and kill him before dealing with the Headless ape. His attacks are similar to the second phase of Guardian ape, so you can use the same method you used on Guardian ape.
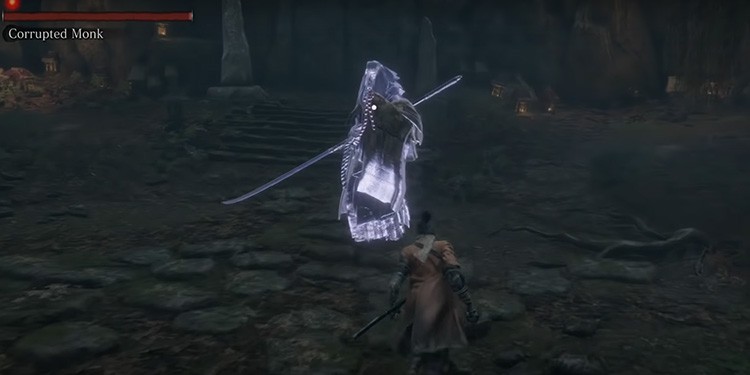
Corrupted Monk Illusion
The easiest boss amongst all others if you have the right items to distract her from attacking. Use items such as snap seed that will damage Monk’s health, whereas fistfuls of ash and firecracker will distract her, and you can land more hits. Corrupted has only one health bar, so she will not have any second phase. However, her attacks deal heavy damage so remember to heal and parry. She has a swing attack and spin attack. Her spin attack is where you can die, so parry as much as possible when she spins.
Isshin Ashina
Get your timing precise and recognize when you have to dodge or deflect. Dodge around him from the left side as soon as he attacks. He is old but fights aggressively in his second phase. He also uses fire slash and fire trail. I recommend using firecrackers in the second phase. It will disturb his postures, and you can land one or more hits. You can repeatedly do this to reduce a chunk of his health.
Great Shinobi Owl
You need to maintain a certain distance from the old man. This will allow you to dodge his shurikens and his bombs. It’s the same old phase of hit and runs. Although the area might be a bit small, running left and right might do the trick. If he attacks and misses, then blows one or two hits and runs back again. You need to have a whirlwind slash for a long attack range. Just keep running at the edge of the arena and attack every time you get the chance. Also, attack only at the time after he finishes his combo moves. Have patience, keep running, and you will beat him after a while.
True Corrupted Monk
You will encounter a True corrupted monk in the Fountainhead palace bridge; this time, she has three health bars. This means she will go to the third phase with her different form. Take some time to read her moves and attacks. Don’t worry about her health and focus only on her posture bar. You want to reach her posture threshold for you to perform a death blow on her. If you can successfully execute deathblow, you are in the second phase. In phase two, jump on a branch above you while she spawns and performs a death blow from above to start phase three. Use firecrackers for distraction, and you will have plenty of time to land three hits. Repeat this process, and she will be down in no time.
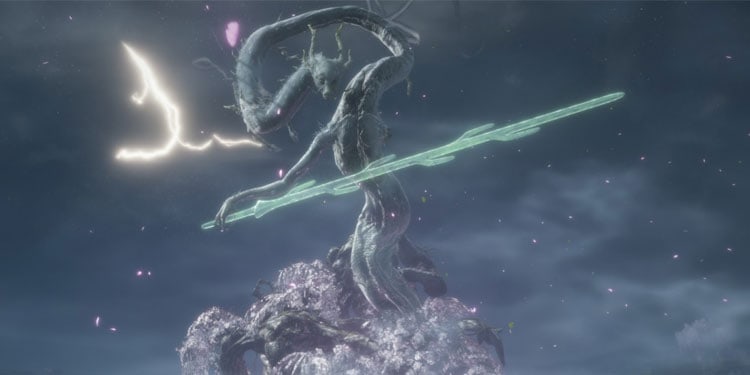
Divine Dragon
It’s a beautiful battle between you and the Divine Dragon. You have to first deal with the old Dragons of the tree. Grapple on a tree branch and jump attack on old dragons, and you will be done with phase one. Then the divine Dragon will appear in phase two. You will have five tree branches in front of you. Grapple the tree branch with lightning and charge lighting towards the boss once you get those. You can either dodge or deflect his sword attack. Once you deal damage, he will knock you back with his wind. Repeat the process of grappling and lightning attack. Over time, his attack becomes more aggressive, and he will tilt and swing his sword. Focus on deflecting his attacks and wait for trees to appear again.
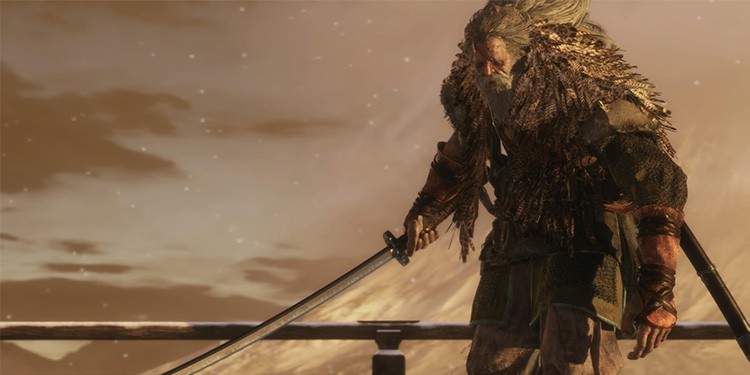
Owl (Father)
He is fast and smart with his moves, so try to stay alive first. I think it takes several attempts to understand his moves and counter them, but there are certain moves that you can and cannot counter. It takes practice and patience to defeat him. He will have every move, including a Mikiri counter and firecracker, so pay attention to his every move and don’t use thrust attack because he will counter it with super Mikiri. You need to play aggressively in his first phase to max his posture threshold. Once the posture gauge is full, you can perform a deathblow and move to the next phase. He will bring his owl in the second phase and attack with the jump attack. He will also have a fire owl hurling towards you and a thrust attack which you can Mikiri counter. It’s a long and difficult battle, but staying long enough in the battle will do the trick.
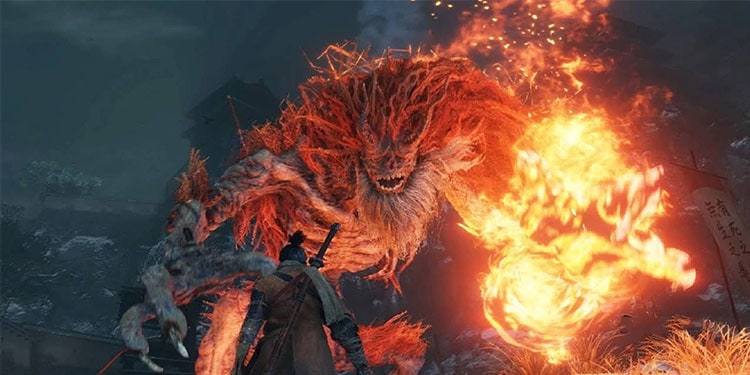
Demon of Hatred
He is an optional and one of the hardest bosses in Sekiro. He uses fire attack with his rush, slam, and swing, so Suzaku’s Lotus Umbrella is necessary to defeat the boss. It will help you absorb all the fire from his attacks. You can, however, defeat the boss without it, but it’s going to be a lot harder and takes longer. He is a huge demon without any sword, so there will be less to no parry, and you also cannot deflect most of his attacks, so dodging and running is the only option. But you can always use the Umbrella shield every time he uses fire attacks. Unlike other bosses where you can parry and counter, he is more like a Darksouls boss with fire attacks. Because he is huge, you can spam attack him by running around but stay out of his attack sight.
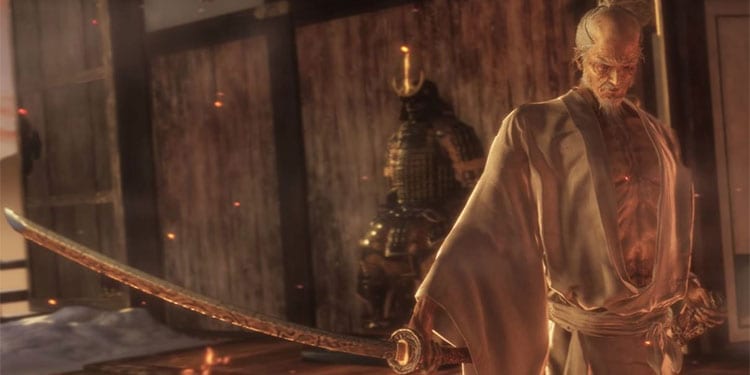
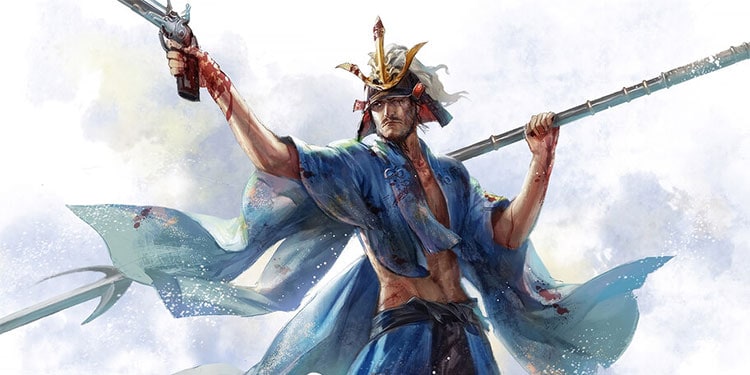
Isshin, The Sword Saint
He is the final boss of Sekiro, so it’s time to use everything in your arsenal because he is the most demanding boss with all the crazy combos, weapon arts, and even lightning attacks. He has so many combos that it’s hard to track. He also uses a spear in phase two for long sweeping attacks. I recommend you to master deflecting his attack and counter when you see kanji signs over your head. He will also have several weapon arts. You can simply use an umbrella to deflect his weapon arts attack. Phase one is a simple act of deflecting his attacks and his sword art. He shoots you with his pistol in phase two but it’s safe if you are at a distance. You can reach phase three if you can maintain distance and deflect his attacks. Phase three is where he attacks you with his lighting sword. You can take advantage of his lightning with lighting reverse. This sends back the lighting towards the attackers. If you reach phase three, then just be patient, maintain distance and wait for his lighting attack so you can reverse it.